플러터에서 내비게이션 메뉴를 구현할 때 가장 많이 사용되는 위젯 중 하나가 바로 Drawer입니다. 이 글에서는 플러터 Drawer의 기본 사용법부터 고급 활용법까지 상세히 설명하고, 예제 코드를 통해 쉽게 이해할수 있도록 설명드리겠습니다.

플러터 Drawer 기본 예제
먼저, 기본적인 Drawer를 포함한 플러터 앱을 만드는 방법을 살펴보겠습니다.
- Drawer 위젯: Scaffold 위젯의 drawer 속성에 Drawer 위젯을 추가
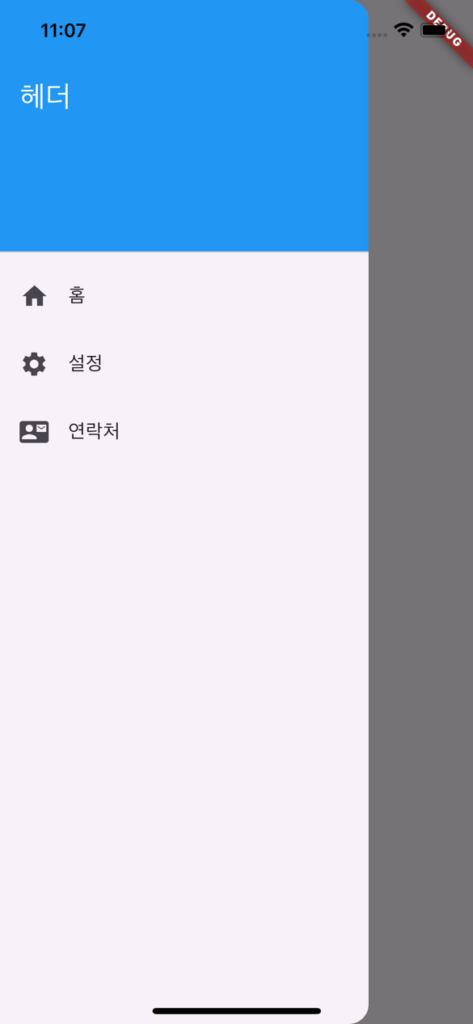
- DrawerHeader: DrawerHeader는 Drawer의 상단 부분에 헤더를 추가
- ListTile: ListTile 위젯을 사용하여 각 메뉴 항목을 구성
- onTap: 각 ListTile의 onTap 속성에 함수를 추가하여 메뉴 항목을 클릭했을 때의 동작을 정의
import 'package:flutter/material.dart';
class MyHomePage extends StatelessWidget {
@override
Widget build(BuildContext context) {
return Scaffold(
appBar: AppBar(
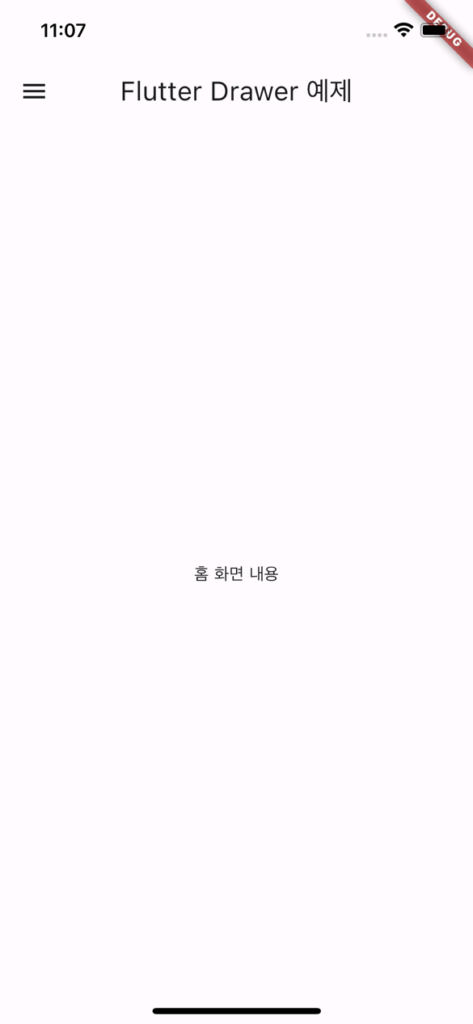
title: Text('Flutter Drawer 예제'),
),
// Scaffold의 Drawer 위젯 정의
drawer: Drawer(
child: ListView(
padding: EdgeInsets.zero, // 기본 패딩 제거
children: <Widget>[
// Drawer의 헤더 정의
DrawerHeader(
decoration: BoxDecoration(
color: Colors.blue, // 헤더의 배경색
),
child: Text(
'헤더', // 헤더 내부의 텍스트
style: TextStyle(
color: Colors.white, // 텍스트 색상
fontSize: 24, // 폰트 크기
),
),
),
// 첫 번째 ListTile 정의
ListTile(
leading: Icon(Icons.home), // ListTile의 아이콘
title: Text('홈'), // ListTile의 제목
onTap: () {
Navigator.pop(context); // 탭 시 Drawer 닫기
},
),
// 두 번째 ListTile 정의
ListTile(
leading: Icon(Icons.settings), // ListTile의 아이콘
title: Text('설정'), // ListTile의 제목
onTap: () {
Navigator.pop(context); // 탭 시 Drawer 닫기
},
),
// 세 번째 ListTile 정의
ListTile(
leading: Icon(Icons.contact_mail), // ListTile의 아이콘
title: Text('연락처'), // ListTile의 제목
onTap: () {
Navigator.pop(context); // 탭 시 Drawer 닫기
},
),
],
),
),
// Scaffold의 본문 정의
body: Center(
child: Text('홈 화면 내용'), // 본문 내용
),
);
}
}
결과 이미지