플러터(Flutter)에서 table_calendar는 달력을 구현하는데 도움을 주는 패키지 중 하나이다. table_calendar을 사용하면 앱에서 달력을 표시하고 사용자에게 날짜를 선택하도록 할 수 있다. 이번 글에서는 일기장 어플을 구현하기 위해 table_calendar 패키지를 사용하여 기본적인 달력을 구현해본다.

목차
플러터 캘린더(table_calendar) 추가
먼저 flutter 프로젝트에서 table_calendar 패키지를 추가해야 한다. pubspec.yaml 파일에 다음과 같이 패키지를 추가한다.
dependencies:
  flutter:
    sdk: flutter
  table_calendar: ^3.0.9
플러터(flutter) 달력 위젯 생성
달력을 표시할 Flutter 위젯을 만들어야 한다. body속성에 TableCalendar 위젯을 사용하였고 다양한 변수와 옵션을 설정할 수 있다 그중에 필요 변수인 다음값을 우선 설정하였다.
- focusedDay: 현재 달력의 포커스된 날짜를 나타내는 변수
- firstDay: 달력에서 표시할 첫 번째 날짜를 나타내는 변수
- lastDay: 달력에서 표시할 마지막 날짜를 나타내는 변수
import 'package:table_calendar/table_calendar.dart';

...

@override
Widget build(BuildContext context) {
  // 화면을 구성하는 데 사용되는 메인 위젯인 Scaffold을 반환
  return Scaffold(
    // 상단 앱 바 설정
    appBar: AppBar(
      title: Text('달력 예제'), // 앱 바의 타이틀 설정
    ),
    // 달력을 표시하는 TableCalendar 위젯을 body에 추가
    body: TableCalendar(
      focusedDay: DateTime.now(),  // 현재 날짜를 기준으로 달력을 표시
      firstDay: DateTime(2020),    // 달력의 시작 날짜 설정
      lastDay: DateTime(2030),     // 달력의 마지막 날짜 설정
    ),
  );
}
간단한 코드로 아래처럼 구현된 화면을 확인할 수 있다.
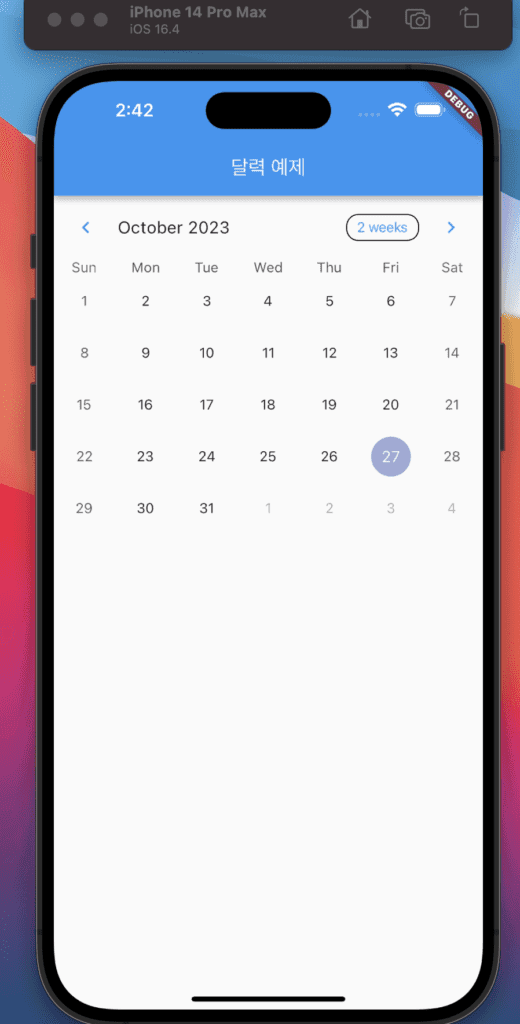
달력 위젯 꾸미기
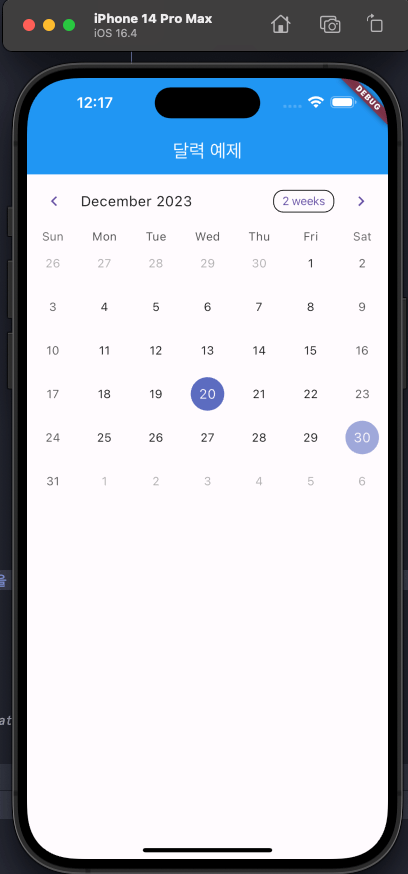
달력에서 날짜를 선택시 선택한 날짜가 표시되도록 수정한다. TableCalendar의 onDaySelected 속성에 캘린더에서 날짜가 선택될때 실행되는 콜백 함수 onDaySelected을 만든다. 이 함수는 DateTime selectedDate를 업데이트하고 StatefulWidget의 setState로 위젯을 다시 빌드하여 상태를 업데이트한다. selectedDayPredicated 속성은 캘린더에서 특정 날짜가 선택된 날짜와 동일한지 여부를 판단한다. true를 반환하면 해당 날짜는 선택된 날짜와 같다고 간주한다. focusedDay 속성에 selectedDate으로 달력을 표시되도록 수정한다.
class _MyCalendarState extends State<MyCalendar> {

  // 초기 선택 날짜를 현재 날짜로 설정
  DateTime selectedDate = DateTime.utc(
    DateTime.now().year,
    DateTime.now().month,
    DateTime.now().day,
  );

  @override
  Widget build(BuildContext context) {
    return Scaffold(
      appBar: AppBar(
        title: Text('달력 예제'),
      ),

      body: TableCalendar(
        // 캘린더에서 날짜가 선택될때 이벤트
        onDaySelected: onDaySelected,
        // 특정 날짜가 선택된 날짜와 동일한지 여부 판단
        selectedDayPredicate: (date) {
          return isSameDay(selectedDate, date);
        },
        focusedDay: selectedDate,
        firstDay: DateTime(2020),
        lastDay: DateTime(2030), /
      ),
    );
  }

  // 달력에서 날짜가 선택됐을 때 호출되는 콜백 함수
  void onDaySelected(DateTime selectedDate, DateTime focusedDate) {
    setState(() {
      this.selectedDate = selectedDate;
    });
  }
}
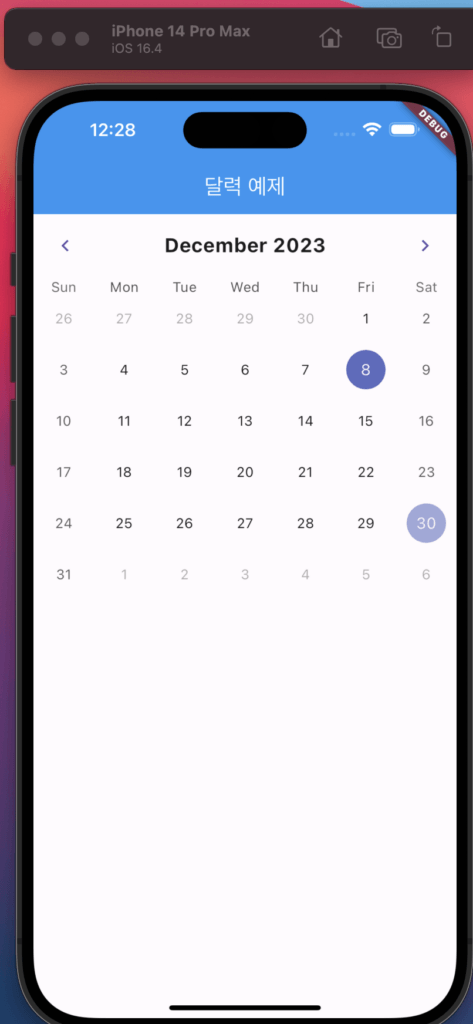
달력의 headerStyle 속성들을 수정 하였다. 주석을 확인하면 쉽게 이해 할 수 있다.
...

body: TableCalendar(
  onDaySelected: onDaySelected,
  selectedDayPredicate: (date) {
    return isSameDay(selectedDate, date);
  },

  focusedDay: selectedDate,
  firstDay: DateTime(2020),
  lastDay: DateTime(2030),

  // 달력 헤더의 스타일 설정
  headerStyle: HeaderStyle(
    titleCentered: true, // 타이틀을 가운데 정렬
    formatButtonVisible: false, // 헤더에 있는 버튼 숨김

    // 타이틀 텍스트 스타일 설정
    titleTextStyle: TextStyle(
      fontWeight: FontWeight.w700, // 타이틀 텍스트 두께
      fontSize: 20.0, // 타이틀 텍스트 크기
    ),
  ),
),

...
구조화
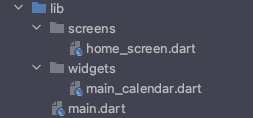
최종 목표인 앱을 구현하기 위해서는 다양한 옵션과 코드들이 필요하기에 코드의 가독성, 유지보수, 재 사용성 여러가지를 고려하여 파일 및 컴포넌트 분할을 효율적으로 구조화 되도록 하여야한다.
위젯을 위한 폴더와 화면을 위한 폴더로 나눴으며 각각의 파일을 살펴보겠다.
main
main.dart 파일은 어플리케이션이 실행이 시작되는 곳이다. main() 함수에서 runApp함수를 호출하여 어플리케이션을 시작한다. MyApp 클래스는 MaterialApp 위젯을 상속하고 루트 위젯을 정의한다. 루트 위젯의 home속성을 사용하여 MyDiaryScreen클래스를 앱의 홈화면으로 지정한다.
# main.dart

import 'package:flutter/material.dart';
import 'screens/home_screen.dart';

void main() {
  // 앱 실행을 시작하는 함수
  runApp(MyApp());
}

class MyApp extends StatelessWidget {
  @override
  Widget build(BuildContext context) {
    // MaterialApp을 사용하여 앱의 기본적인 디자인과 루트 화면을 설정
    return MaterialApp(
      home: MyDiaryScreen(), // MyDiaryScreen을 루트 화면으로 지정
    );
  }
}
screens
screens/home_screen.dart 파일에서 scaffold를 사용하여 홈화면을 구성하였다.
# home_screen.dart

import 'package:diary/widgets/main_calendar.dart';
import 'package:flutter/material.dart';

class MyDiaryScreen extends StatefulWidget {
  const MyDiaryScreen({Key? key}) : super(key: key);

  @override
  State<MyDiaryScreen> createState() => _MyCalendarScreenState();
}

class _MyCalendarScreenState extends State<MyDiaryScreen> {
  // 선택된 날짜를 저장하는 변수
  DateTime selectedDate = DateTime.utc(
    DateTime.now().year,
    DateTime.now().month,
    DateTime.now().day,
  );

  @override
  Widget build(BuildContext context) {
    // Scaffold를 사용하여 화면의 구조를 정의
    return Scaffold(
        appBar: AppBar(
          title: Text('Diary'), // 상단 앱 바에 표시될 타이틀 설정
        ),
        body: MainCalendar(
          selectedDate: selectedDate, // MainCalendar에 현재 선택된 날짜 전달
          onDaySelected: onDaySelected, // MainCalendar에서 날짜 선택 시 호출될 콜백 함수 설정
        ));
  }

  // MainCalendar에서 호출되는 콜백 함수로, 선택된 날짜를 업데이트
  void onDaySelected(DateTime selectedDate, DateTime focusedDate) {
    setState(() {
      this.selectedDate = selectedDate;
    });
  }
}
widgets
widgets/main_calendar.dart 파일에서 달력 커스텀 위젯을 따로 구현하였다. 홈화면에서의 onDaySelected, selectedData를 필수 매개 변수로 받는다. 그리고 selectedDayPredicate으로 클릭된 날짜를 표시하는 옵션을 추가 하였다.
# main_calendar.dart

import 'package:flutter/material.dart';
import 'package:table_calendar/table_calendar.dart';

class MainCalendar extends StatelessWidget {
  final OnDaySelected onDaySelected;
  final DateTime selectedDate;

  // MainCalendar 생성자
  MainCalendar({
    required this.onDaySelected,   // 날짜 선택 시 호출될 콜백 함수
    required this.selectedDate,    // 현재 선택된 날짜
  });

  @override
  Widget build(BuildContext context) {
    // TableCalendar 위젯을 사용하여 달력을 표시
    return TableCalendar(
      onDaySelected: onDaySelected,  // 날짜 선택 시 호출될 콜백 함수 설정
      selectedDayPredicate: (date) {
        // 선택된 날짜와 현재 날짜가 같은지 확인하여 선택된 날짜를 표시
        return isSameDay(selectedDate, date);
      },
      focusedDay: DateTime.now(),   // 현재 날짜를 기준으로 달력을 표시
      firstDay: DateTime(2020),     // 달력의 시작 날짜 설정
      lastDay: DateTime(2030),      // 달력의 마지막 날짜 설정
    );
  }
}
마무리
지금까지 table_calendar을 사용해 달력을 구현하는 방법을 설명드리고 앞으로 개발될 애플리케이션을 위해 프로젝트를 구조화하였습니다. 다음글에서는 생성된 달력을 이용하여 입력할 수 있는 페이지를 만들고 화면 전환이 될 수 있도록 기능을 추가하도록 하겠습니다. 감사합니다.
전체 코드는 링크에서 확인할 수 있습니다.
